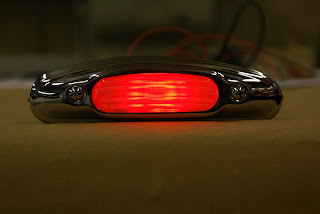
The available space within the front side light was very limited and a solution using individual LED's (based around the rear light design) proved unsatisfactory. To resolve the space issue, I carefully removed the lamp holder from the lens assembly. This effectively gave me an empty side light housing to play with.
So, time for a re-think. Fortuitously, friend Nick dropped in to use the facilities to fettle an amateur radio aerial, and we got chatting about the indicator project. Nick has an amazing knowledge of all things technical and electrical in particular. Consequently, pre-wikipedia, "Nick-L-Know" was the standard response to most technical queries.
 |
| Nick Peckett AKA Peckett of Kabul |
Nick has spent the final third of his working life developing the mobile phone network in Afghanistan, his company initially working for the Taliban, then after 9/11 for the first commercial Afghan Celular /Internet operator. This unusual and rather dangerous occupation took him all over Afghanistan but as the local populous, regardless of allegiance quite liked the idea of making phone calls, he was generally welcomed in even the most hostile of places. So what did 'Peckett of Kabul' suggest :
"Why not just take a conventional forward facing super bright LED bulb, stick it to a short length of orange plastic tube and wrap the tube in silver foil to stop the light escaping. This can sit inside the side light housing along with another LED / clear plastic tube for the sidelight". Simple.
 |
| 11mm OD plastic tubes bought from ebay |
The initial result was not encouraging with the tube seeming to attenuate the light significantly. Polishing the ends (as we do with fibre optic cables for RF transmissions) completely resolved this allowing the full intensity of the bulb to shine through.
 |
| ends polished up on fine emery paper and chrome polish |
 |
| Pre-assembly |
A few turns of insulation tape (blue in the photo) nicely brings the OD of the tube up to that of the LED. The LED is then joined up to the tube using a short length of heat shrink. As the indicator need to be brighter than the sidelight, I doubled up on the orange.
 |
| two orange indicator lights should differentiate them from single side light |
They are wrapped together to form a triangular shaped package which fits snugly into the sidelight pod. If I need to access them in future it will involve removing the light from the wing but assuming the LED's live up to their specified life of 50,000 hours, this really isn't going to be an issue.
Not having B9AS lamp holders to hand, I soldered tails directly onto the bulbs. This is quite a tricky operation, requiring just enough heat to flow the solder without melting whatever else is connected on the inside.
Albeit some time ago, years of fault finding down to component level, removing and replacing integrated circuits with tiny soldering Irons lets me get away with this, but it's very easy to get wrong and with the LED bulbs currently costing over a fiver, not really recommended.
 |
| Lash up to prove the principle - fits neatly into light pod |
The tails are wrapped to form a three wire loom which goes through a sealing grommet in the wing and is terminated directly into the IP66 junction box. (First picture on Post 47)
This is all very much a 'lash up' to prove the principle and subject to it performing as required will be developed into a rather more professional looking package.
 |
| Side light - very bright even in fluorescent light / daylight |
 |
| Indicator in twilight - surely unmissable |
Flushed with success, I now turn my attention to the brake lights. I've never liked the idea of them sharing a bulb with the sidelight. During my 140 restoration I added a set of red LED's to the number plate / reverse light to provide an additional and separate brake light. I still had some red LED's left over and it was relatively easy to make up a similar arrangement setting them in a large grommet which simply sits around the reverse light bulb. To complete the set up I replaced the remaining bulbs with LED's
 |
| Brake light added to the reverse / number plate light - all LED's |
 |
| Just the job |
Miscellany
On my 'to do' list for a few years now has been the design and manufacture of a camping type chair that doesn't take up a chunk of space in an XK's limited boot / trunk.
Every once in a while, I've searched ebay for just such an item, half hoping that someone had invented it already to save me the trouble and half hoping they hadn't. In reality, an ambition too far that I was content to live with rather than do something about.
With the rally season about to start and my existing space consuming camping chairs on their last legs so to speak, I had another look and their it was. Made by Australian company Helinox, it weighs 836 grams and more importantly folds up into something approaching the size of a shoe box. I bought a couple of them and they are quick and easy to assemble and very comfortable if a little wobbly. With a capacity of 145Kg, even my portly frame only takes up 65% of the design max so it should be OK.
 |
| Helinox Chair 1 |
Next post mid May
