Tuesday, 17 April 2012

POST 28 - APRIL 2012 - ENGINE BUILD PART 4 AND REPRO PARTS PROBLEMS

Assembling the timing gear and fitting to the engine block

I may be unlucky, but with a couple of notable exceptions, the general quality of 'repro' parts I've had delivered from UK suppliers leaves a good deal to be desired.  I guess to some extent it has always been so, with constant downward pressure on prices limiting what can be achieved in quality.  Could it be that quality is considered less important for vehicles that typically cover small annual mileages.  Failure for example, of a relatively insignificant engine part can have disastrous and very expensive consequences, but the passage of time means that we we are less likely to hold the culprits to account.  I've dealt with most of the purveyors of classic car parts over the years, and I suspect that many have quite a few suppliers in common.  Imported parts from the Far East, India and China have garnered a reputation for poor quality, but I am told that many Jaguar repro parts are manufactured around the Coventry area by ex employees of the once Great British motor industry (could there be a clue here?).  Conversely, parts purchased  from the USA have been flawless. 

Surely it would be better to pay a little more, then spend a good deal less time checking and fettling facsimile parts to make them good for purpose. 
So what has brought about this 'rant'.
I required new chains, guides and a tensioner conversion for my engine rebuild. Result:

The chains supplied have arrows on the links indicating I suppose the direction of travel (why else would they be there?) but every few links they randomly change direction.  This and the split link arrangement left me feeling decidedly uncomfortable.  After some deliberation, I bought another pair, original Reynolds for the top and a split link free repro (no originals available) for the bottom.

The bottom chain guide was around 10 degrees off being at right angles to it's mounting base, meaning if not 'adjusted' the chain would have worn the guide away on the inside first.

The top chain guides, combined with the spacers supplied are around 1mm less deep than the original brass items (1.125") which means the aluminium castings they are sandwiched between could be bent / stressed.  Also the rubber face sits around 125 thou higher than the original.  Whilst easily remedied, is this intentional, and better than the original, or an error.  How do I find out? 

New and old upper chain guides.  Unusually, a post on Jag lovers
forum asking what might be used to replace the original worn nylon
type material on the lovely brass casting drew a complete blank.
Have I inadvertently upset the usual sages. 


New upper guides are 35 thou less deep (should be 1.125")
Does it matter?  I'd love to know !

New upper guides are also around 0.125" higher than originals.
Is this an improved design or just a mistake.
Again, I would really like to know.
The hydraulic conversion kit brass mounting block required a good deal of relieving to allow it to fit, not really a problem, but when the hydraulic bit was installed, it was tight up against its back stop and still exerting excessive pressure on the chain.  I would guess the rubber pad's life would not be long (but possibly a couple of years for a low mileage classic). 
The tensioner conversion takes its oil from the feed originally used for an oil spray bar, which is dispensed with, so no more oil for the crankshaft sprocket and distributor drive gear.  I guess this must be OK but it would be good to know for certain.

Brass mounting block needed quite a bit taking off to make it fit.
Is this peculiar to my engine or all engines ?

All of the above issues are to some extent sorted.  As an amateur restorer my time is effectively free but I wouldn't like to be footing the bill from a professional for all this additional remedial work.

So - having got that off my chest, back to the engine build.   I have a couple of books that helped enormously, each with its own slant on the processes involved. 


JEC publication - 'On Jaguar XK120 Restoration' - ISBN 1 873098 38 1
A fairly comprehensive 120 restoration guide with some good detail pics.

Excellent and well known Dave Pollard book  'Jaguar XK Engine'
ISBN 1 85960 007 7   Don't start work without it.
Both books mainly relate to later XK engines, so I am not sure if my very early engine has some minor differences, sometimes requiring a slightly different approach.  In summary, this seems to be the preferred procedure and it mostly worked for me:

First - assemble rear plate - Graphogen on all moving parts

Next fit the front plate and adjuster mechanism.
Note marks on serrated wheel probably due to attempts
to adjust with incorrect tool.  Fortunately no real damage.

then - hang  the assembly from crank sprocket
(Engine upside down)

Fit assembly.  Note - lower guide in place - parallel in both plains
to chain but not quite touching.

Finally fit Hydraulic tensioner conversion.  Note how the rubber foot
is totally back in it's housing.  Chain tension is just acceptable after
enlarging all tensioner assembly holes to allow it to move around
1.5mm to left.
Some points not mentioned in either book:
Double check and measure every repro part for quality, dimensions etc. against your original parts and remember to grumble at your supplier if you need to tweak them.  They might eventually start to get the message.
If you fit the hydraulic chain tensioner
Install the bottom chain on its intermediate sprocket before you finally fit it's shaft in place and secure with a circlip.  (my none split link chain wouldn't quite go on with the sprocket fitted first)

This part of the engine build has taken quite a bit longer than I had planned and was not particularly enjoyable, so it's time for a little light relief. 
The body shop were never really happy with the boot lid, so I plan to make a new wood frame and fit it with a good skin, but this first needs to remove from yet another lid I found locally.  Next post showing this to completion (hopefully) will be at the beginning of May.

Sunday, 1 April 2012

POST 27 - APRIL 2012 - ENGINE REBUILD PART 3 - SHORT MOTOR

New to Blogs?
If you're reading this for the first time, you might want to start at the beginning. You can use the "Blog Archive" list to the right to quickly navigate around. To find the start, click on 2010 (1) to go to the First Post. Use the "Blog Archive" list again (2012) to return to here or anywhere in between. Sorry if this is a little confusing but its just the way that blogs apparently work. The last post is always the first post you see.

Posts are made around the beginning and middle of each month give or take a few days.

Please keep in mind when reading this particular post that I am but an enthusiastic amateur albeit taking a good deal of care.  My goal is to build a very reliable smooth running engine, but if I make a mistake, it will probably be a big one!

Although only last October, it seems to be an awfully long time ago (especially in memory recall terms) that I dismantled the engine. I was encouraged to do the re-build myself after several offers of technical assistance from friends and acquaintances.  My initial requirement was to find a first rate machine shop, ideally with some XK engine knowledge.   After some research I decided on a company quite local to home,  AMAC in Northallerton.  Always very busy and with an excellent reputation, I was forewarned that it may be gone a while, and so it was.  As I have the luxury of time, this was not really a problem. Four months later and right on cue, I got the call at the end of February advising that the Block, crank and other associated bottom half components were ready for collection.  The cylinder head repairs and machining were still to do, but this would give me plenty of stuff to be going on with.

Courtesy of friend Dan at Classic Jaguar in Texas I received in December, a set of beautifully engineered Ross forged alloy pistons and Total Seal rings with individual piston weights differing no more than half a gram. AMAC do a similar balancing job on the con-rods, after which they dynamically balance the crank with flywheel, clutch pressure plate and front damper.   Dan also supplied a nicely engineered modern rear oil seal conversion, which just required the scroll to be machined off the crank and the appropriate seal area to be turned down to 2.632 inches.   With the front oil seal also upgraded to a modern type my past 'persona non grata' status at some posh driveways may be reviewed.

Wonder what Sigmund would make of this?
Checking the block, I'm greatly encouraged by the spotlessly clean condition of all the internal oil ways. AMAC pickled the block and cleaned masses of compressed gunge from the crank. Running  spiral brushes through the various oil passage ways shows not a vestige of anything unpleasant. Great start.

And this !  Surely a Turner prize photograph.
Mechanic mate Mel produces a tube of Graphogen assembly grease from the back of his garage, last used in the mid 80's he tells me and no longer needed.  Apparently modern car engines are very rarely re-built. When they fail (which is unusual) a replacement is normally acquired from a breaker.

The main bearing shells are installed dry into the block and caps and Graphogen grease is coated onto the bearing surfaces.  The top half of the new rear oil seal is fitted using Locktite on the machine screws.  The crank is gingerly lowered into place and the caps (centre with new thrust bearings) are fitted.  End-float is checked and measures an ideal 0.08mm, just over 3 thou. 
Lightly lubed bolts and hardened parallel washers (in place of the original tab washers) are gradually torqued down to 72 LB FT. The bottom half of the rear seal conversion is installed, again using Locktite.  Afternoon visitors take turns to spin the crank and marvel at the smoothness of reciprocation.  I should think in all, around an hours work for a professional.  Allowing for thinking, socialising and tea drinking, a good days work for me.

End float measurement.  Also clearly shows bottom half of oil
seal conversion and Graphogen assembly lube on main bearing.
Completely confident with the crank installation, I move on to to the pistons, con rods and big ends. AMAC have precisely set the gaps on each piston ring in its bore with a very neat miniature grinding machine.  Including the 3 part oil ring set this equates to 5 rings per bore, 30 in total. Not something I would even attempt by hand.  With new con rod fasteners, the question of torque wrenches versus new fangled stretch gauges arises. All highly technical, but I think that a well lubricated factory spec of 37 LB / FT of torque will provide the necessary clamp forces for my application which is unlikely to exceed 5000 RPM ( I believe applying around an amazing half a ton load on each con-rod bolt at maximum G)

Total Seal rings come with very specific fitting instructions.
Two Spirolox wrist pin retainers each side replace usual circlips.
Note new type of nut for con-rod bolts.  No washers or lock tabs
of any sort.  Seems odd but I am assured it is totally correct.

Ross forged piston with Total Seal rings
Con rod little end bushes were virtually unworn and in excellent condition. Big ends were sized and found to be near perfect. Con rods, gudgeon (wrist) pins and pistons were assembled. Spirolox wrist pin retainers were supplied instead of the usual circlip. My initial attempts to install these fiddly little coils of sprung steel were hugely frustrating.   By early afternoon and at the point of giving up, (8.00am Austin Texas time) I make a call for help to Dan, and after a little explanation from his engine builder I'm popping them in like a pro. Just looking at the design gives me great confidence in the inherent security of these things. Two on each side of the pin seems a little OTT but why skimp when its known to be an occasional cause of disastrous failure.

Spirolox gudgeon pin retainer opened up ready to be pushed
in to the groove bit by bit.  Easy when you know how.
Machine work on the engine block was pretty much as predicted with number 3 bore re-sleeved and all taken out to +30 thou.  The deck sloped 15 thou out of parallel to the line of the crankshaft (apparently not unusual for this vintage) and this has been corrected with a not inconsiderable skim.  The pistons with 25cc of dome now sit between 26 and 31 thou above the deck.  Temporarily swapping Pistons and rods between the cylinders gives another slightly different set of numbers, showing that both con rod length and crank throw are jointly responsible.  These variations I understand are accounted for by original machining tolerances.

Very accurate but Heath Robinson device to measure piston to
deck height.  Steel block holding gauge was a tow ball spacer
in an earlier life.
Assuming the head is also skimmed  a maximum of 25 thou this will effectively increase the compression ratio from 8:1 to around 8.75:1  Changing from the standard 15 thou gasket to a 40 thou composite item will bring this down I calculate to 8.4:1 (comfortable 95 octane country) which is more or less where I would ideally like to be.

One part of the re-assembly I have been a tad apprehensive about is the installation of the distributor drive mechanism as there seem to be a number of opportunities to get this wrong.  I usually only require one!
In fact, it turns out to be quite straightforward.  With Pistons 1 and 6 at TDC the distributor drive shaft should look like the picture below with the drive line at approximately the 5 minutes to 5 position.   Its only when you come to set the valve timing that you need to ensure that the larger segment is to the right.  If it's a little out, your distributor will point in not quite the right direction.  Not ideal, but not really a problem.  However, if you installed it entirely the wrong way round, your distributor would need to be 180 degrees about face, and that wouldn't be good.

With 1 & 6 at TDC, position of distributor drive shaft - 5 minutes to 5
Larger segment to the right when you get round to valve timing.
Assembling the distributor drive turned out to be a two man job.  My helper held the drive shaft in place with a bar and socket pushed up the orifice, whilst I carefully aligned the cog with its woodruff key and tapped it on to the interference fit shaft with an old socket.     
Distributor drive - awaiting lock washer and nut.
Note the increased O/D collar on the crank to accommodate a modern oil seal.
Final task on the underside is to fit a new oil pump and the oil pick up assembly.  A metal gauze filter appears to cover the inlet to a round metal chamber, which I reason must be full of all manor of nasty gunge but I can't see any way to get into it.  I drop it into large bowl of thinners in the hope that this might dissolve its unknown contents .  Very strange, it seems that its made of a metal so light that it floats.  This is very exciting.  The penny finally drops.  I can't get into it because it's completely sealed.  Its actually full of air.  Yes - its a float, with the oil pick up pipe passing through it.

New oil pump and incredible floating err - float
With the oil pump, float assembly and associated metal work back in place and one final check on torque setting and all other fasteners, this completes the main part of the engine bottom half assembly. 

Next scary task is try and make some sense of all of those complicated looking sprockets, chains and things driven from the crank shaft. 


Monday, 19 March 2012

POST 26 - MARCH 2012 - START OF CHASSIS ASSEMBLY

There are times when very little seems to change on this project in spite of completing many minor tasks, cleaning, re-conditioning, painting components and making up batches of parts ready for eventual assembly.  Then, one day it all happens, it all starts to come together and makes all that effort worthwhile.  From starting work on fitting the front and rear suspension, it took very little time to have it looking almost like a rolling chassis.

Rear Axle installed.  using a hoist makes this a relatively easy job.
Note plates and spring hanger brackets added for Telescopic shocks.

Rod in place of Shock absorber sets distance at 15 and 5/8 inches
 for setting torsion bars.  Will need to be replaced with something
 more substantial before they are fully wound up.
From past experience, my preferred method for re-assembly, is to do lots of fettling, cleaning of threads and easing of bits as required, so that things generally go together easily, without the need for even mild force. Fasteners that are easily accessible are not fully tightened or torqued up and all accessible tab washers are left open. I don't therefore need to worry about what I forgot to tighten up as the answer is actually everything.  Only when I'm happy that it definitely won't need to come apart again do I systematically tighten and re-check every fastener, knock over tab washers and fit split pins.

Whilst most of the work was fairly straightforward I did hit a couple of problems. 

Fitting the front disc brake conversion turned out to be an interesting challenge and an excellent opportunity to re-assess my IQ.
I can't think of any reasonable or satisfactory explanation for the selection of parts in the kit supplied.  Perhaps the culprit had a hard night out followed by a hung over wander around the stores randomly picking any likely looking components.  To be fair, the callipers, pads and discs as the basis of the kit were correct but the remaining parts, whilst definitely brake related had little to do with a 120 front disc brake conversion.  Odd numbers of the correct fasteners with surplus pipes, brackets, nuts and bolts just added to the confusion.  The lack of documentation / parts list also didn't help. Some overnight bits from the supplier and a trip to my local nut and bolt warehouse soon got the job back on track.

Disc brake conversion looks good but only after some head scratching
Another small anomaly, only partly resolved relates to the inside bottom part of the front suspension upright and its proximity to the outer end of the lower rear wishbone lever.  With the suspension fully unloaded, (shock absorber at max length) the two parts actually foul well before full lock is achieved.  Whilst highly unlikely to ever create a problem (think rally circuit with huge bump followed by sharp corner and knackered shock absorber) it did seem odd.  I made some good drawings, took plenty of photos and dismantled / assembled one side at a time so am pretty confident its all correctly assembled with Castor and Camber shims in the right (pre-adjustment) places.  I eventually find the time to jack up my 140 to make a comparison, and find its identical.  Who knows, perhaps its a safety feature!

Suspension geometry allows fouling before full lock, when
shock absorber is fully extended
The cost of a set of OEM (Timken I think) front wheel bearings came as a bit if a surprise at over £200.00 whilst a "pattern" set cost just £52.00.  My rear axle had all new Timken bearings fitted after axle specialist Paul proclaimed "I wouldn't fit some of the re-pro bearings I've seen to a pram".  In a quandary I research the subject a little further and even consider re-fitting the existing items which look reasonably OK.  I am eventually assured by a very well respected supplier with an excellent reputation not worth loosing, that their replacement bearings are made in Japan and are of super high quality, so I buy a set.  They do feel smoother and are almost silent (spinning up a wheel) compared to the old items.

New and old bearing.  Blown up 10 mega pixel picture shows up
difference.  What would Ron Dennis think?
Wheel re-finisher and Powder coating specialist Max of Romax in Stockton yet again went the extra mile and sourced the correct shade of white for my wheels.  After stripping off the manufacturers (MWS) new paint they were treated to a superb and perfect finish then shod with a set Michelin Pilote X tyres.  Whilst the total outlay was considerable, I think the end result makes it worthwhile.

Michelin Pilote X Radial looks just right

From bare to rolling chassis seemed to happen very quickly
Note engine block and associated parts in the background of the above picture. I still have a few loose ends to sort on the chassis, but this week should see the start of the the bottom half motor build.

Monday, 5 March 2012

POST 25 - MARCH 2012 - WHY DO WE DO IT ?

New to Blogs?
If you're reading this for the first time, you might want to start at the beginning. You can use the "Blog Archive" list to the right to quickly navigate around. To find the start, click on 2010 (1) to go to the First Post. Use the "Blog Archive" list again (2012) to return to here or anywhere in between. Sorry if this is a little confusing but its just the way that blogs apparently work. The last post is always the first post you see.

Time I think for a little light relief from from the usual "whats been completed in the last couple of weeks" type of post.  Work has slowed again because I seem to be waiting endlessly for a few crucial bits.  All promised and imminent.  Just not here!  So I may as well take the opportunity to see how the project is stacking up fiscally.  Always a bit scary, especially remembering the initial cost (see first post)

Total estimate for parts including all the missing bits and upgrades stood at around £23K and that part of the budget seems to be pretty well on track with around 85% now sourced. 

New chrome parts to replace those lost.  Bumpers, side lights and
windscreen.  Possibly easier to source than bits for my Audi.
And if I was sending myself an interim invoice for the hours spent aspect of the project, including the contracted out stuff, it would probably look something like this:

Detail                            Estimated Requirement         Total hours to date
My Time - Workshop                    2500                                       800
My Time - Other                            500                                        300
Body Shop                                   700                                        300
Machine shop                                60                                          30
Upholstery                                     60                                          10

Its not hard to work out from this, that if I charged my time out at a similar rate to the average Northern specialist, I'd be well on my way to incurring a thumping big loss, even more so, I would think, if I was in the South East.  The exact virtual deficit of course, depends upon the final value of the car which in turn depends upon how good a job I make and to a greater extent how well 120 Roadster values fair in the coming year and current financial climate.

Question is, what actually constitutes an hours work?  I would have to confess that my work rate, is appalling.  Music induced snoozes, egg and bacon bun breaks and lengthy discussions with enthusiastic visitors are all included in my estimate of 'time spent to date', but it's my time and I can spend it as I wish!
It also surprises me just how much time is spent researching stuff, sourcing parts, consulting workshop manuals and generally trying to remember how things go back together.

A good quality recliner tool is in my view an essential part of
any workshop inventory.  It's many uses include planning,
plotting, contemplating, snoozing, and music appreciation.
The uninitiated (read - normal people) occasionally ask why I expend so much time and effort for potentially no monetary gain.  No single answer can hope to suffice, but here are a few good reasons:
What else would I do with an average of 20 hours a week out of 168?
Contact with many interesting, equally nutty folks and some very skilled specialists.
It's an easy and relaxed conduit to meet other enthusiasts, to share ideas and knowledge.
There's a sociable and enjoyable club scene with some excellent events, rallies and trips.
Satisfaction and pride of perfecting each small part to eventually be assembled into something admired (hopefully).  Its also interesting to note that people are rarely envious when they are aware of the effort involved.

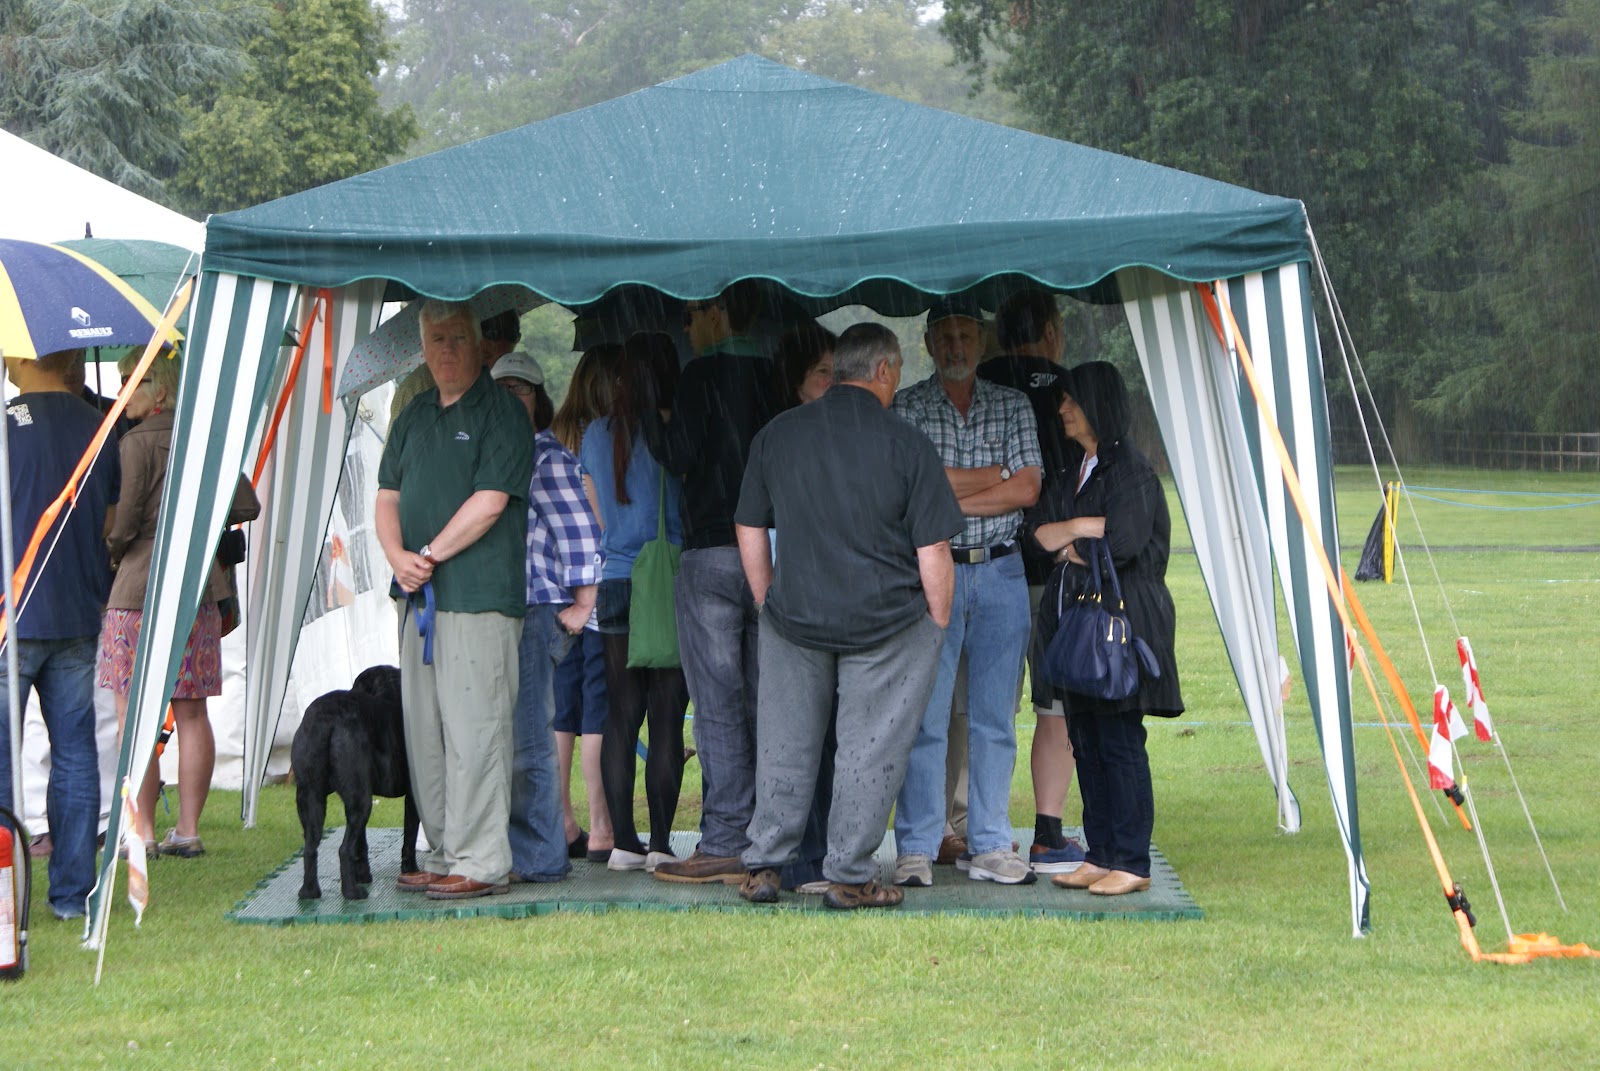
Rain can't stop us enjoying ourselves !   JEC Rally - Newby Hall 2011
Financial benefits (if any) are a little more obscure.  With no intention to ever sell, I like the thought of leaving each of my three Grandchildren an XK rather than some £K. They'll probably flog them at the first opportunity and take a couple of years out, but one keeper out of three would be good.  Wishful thinking I suspect but 'Bobsy's' DNA from skinned knuckles thoroughly imprinted on their inheritance could make a difference.  Then again. I might change my mind twenty years from now, flog em all and take a couple of years out myself!

Grand Daughter Freyer completely at home in 140 Fixed Head
It is encouraging to see 120 Roadsters doing nicely in the classic car market.  A recent report in the JEC magazine says they've outperformed money in the bank by 67% in the past 30 months with 140 Fixed Heads trailing at 39%.  At that rate I might get a return on my time investment after all.

All too easy to be sidetracked by this non productive, non technical stuff .  Time to get back to the job in hand:
Machining of the block and crank is now completed and I plan to collect them in the next day or so.  I will shortly be spoilt for choice regarding what to do next, so my mid March post should report lots of bits being put back together.

Tuesday, 21 February 2012

POST 24 - FEBRUARY 2012 - CONCOURSE COMPROMISES

Until now, for me, concours competitions have been for other people, unjustly categorised in my mind as enthusiastic owners as opposed to hard core restoration enthusiasts.  If as planned, I bring this car back to its original as new state, is there not a case to at least have a bash at the concours scene and possibly enjoy the accolades and added value that a couple of trophies would bring.
Hypocritically, I have in the past judged a couple of local mixed mark events and have been more than aware of my limited detail knowledge, in spite of being immersed in the classic car scene for something approaching half a century.  I would have to add that some of my fellow judges were perhaps even less knowledgeable, which is a bit of a worry. 
Given my competitive streak, and the aforementioned potential vagaries of adjudication, I am not sure that I could live with the maxim that 'discretion is the better part of valour' upon coming second.  Coming third doesn't bear thinking about.
Concours related decisions for me, are mainly centred around the conflict of ideally using a car almost as a daily driver for around eight months of the year.  Compromises in favour of both ideals will have to be made.  Specifically:

The paint finish for the chassis. Originally, I believe a very thin coat of semi gloss black, possibly bitumen based paint. No primer or undercoat.


Remnants of paint provide a clue to original finish
After blast cleaning back to bear metal and etch priming, the chassis was seam sealed and given a liberal covering of fine texture stone guard, followed by several coats of semi gloss paint. It was then liberally impregnated with wax oil in every orifice.  For now and the next few years, the only person to care about this will be me.  Imagine then, another sixty years from now (President Ahmadinejad willing), some future custodian enjoying the fruits of my labours with a still rust free chassis.  That's the goal!

Chassis now finished for maximum protection.
The next issue again relates to paint.  Before the move from Foleshill to Browns Lane in 1952, all cars, possibly with the exception of motor show exhibits had their engine compartments and boots (trunks) brush painted black.  After the move they were painted body colour everywhere, on rotisseries. 
Picture clearly shows black paint in boot area, but not on hinge panel.

Undisturbed black (now with blue tinge) paint.  Brush marks
clearly visible.
I can't recall ever seeing a restored early 120 where this feature has been retained, and discussing the additional work to achieve this with the body shop, I can see why.  Not preserving this distinct difference would be for me, too obvious a deviation from original, so I think it's well worth the extra effort.

Another particular aversion are seats with immaculate marbled leather, so perfect that it looks unnatural, almost plastic, no variations, creases or faults, to me, this is not a good look.    I am told that the leather is specially sourced from Germany where they don't use barbed wire, so no cuts or scratches.  Surly this should not be seen as a positive feature in any competition where originality is prized!

Spats and wheels are an even more contentious subject.  I quite dislike the look of XK's with spats.  A view I think shared by all but a few die hard purists.  I do like wire wheels, painted, not chrome.  In 1950 all XK's came with steel wheels and spats. Wire wheels weren't even an option until March 1951.  Never the less, this is one aspect of the project not open to discussion.  Body colour wires will be fitted. 
KRU600 - photo courtesy of first owner Vernon Maitland
Spats - love em or hate em! 
The original steel wheels and spats will be cleaned, sprayed with wax and properly crated so that some future owner will have the option of easily taking the car back to original spec if preferred.

In all other respects, KRU600 should be indistinguishable from new.  There will be a good many upgrades as detailed previously, but hidden away, out of sight from even the most hair-splitting concours judge.  The summer of 2013 should be interesting.

Thursday, 2 February 2012

POST 23 - FEBRUARY 2012 - REAL PROGRESS AT LAST

With holidays owed from 2011 (plus 3 days from 2010!) and with my business partner firmly back in harness, it would be foolish to miss the opportunity to take some time off and get the project back on schedule. 
The next major target date is early April when I get the chassis back from Alex and should by then have the axle and all suspension parts fully refurbished and ready to fit.  With any luck, I might also have the engine built and ready to install.
Right now its all a bit messy, lots of activity, but with quite a few sub assemblies being worked on simultaneously, while I wait for parts and outside contractors to complete various specialist bits.

Its probably most appropriate (if a little boring) at this point to simply include a selection of un-themed pictures to give a flavour of the different jobs in hand.

Off Side Front Suspension ready for re-assembly with all new
Poly Bushes and Ball joints.  All metalwork powder coated
and all fasteners zinc plated.  Note new shock absorber bottom
mounting pin (RH side of pic), now with thread, instead of that
really naff washer and split pin arrangement. 

Bonnet back from Leaping Cats with 48 perfect louvres pressed in.
Problem with this is that the vee between the cam covers can
fill with water in heavy rain if parked pointing down hill. Ali plate
bonded to underside will allow fixing of a thin aluminium sheet
to hopefully drain water down the sides of the engine.
Simple fabricated ali sheets will resolve rusty spark plug problem
caused by water "ponding" in centre of engine Vee.

Rear brake parts for one side, ready for assembly.  Shoes supplied turned
out to be for a later version 120 (post Feb 52) so I had the originals
 re-shod with bonded linings at half the cost.  Unfortunately two had
the linings bonded in the wrong place so I am still waiting for them
to come back.  All too typical a parts supply saga.

ENV Diff dismantled and looking good with all bearings replaced
as a matter of course.  This was done by Gearbox and Axle specialist
and generally good bloke, Paul at Lagonda Garage, Billingham.

Another conundrum.  On re-assembling the rear axle, the clearance
for the tapered wheel bearings had increased from the specified
5 to 8 thou to around 20 thou.  Checked all the obvious causes and
was contemplating having the 62 thou shims ground down to correct
the problem when it suddenly dawned on me - around 12 thou of powder
coating had been added, instead of the usual vestige (2 thou) of Jaguar
 factory paint.  It took the best part of an hour to sand back.

All is well again.  0.13mm - just over 5 thou will do nicely. Just
enough to give a barely perceptible feeling / indication of end float.

Another "fill in" job is to sort all the bits for re-chroming.
Extreme care was needed to remove windscreen frames from
the glass,but they are in pretty good shape and should
re-chrome to perfection.

Quite difficult to see but if you look closely (enlarge the picture) you
can just make out the date code of the triplex toughened windscreen
glass, with a dot against "D" - the ninth letter of "TOUGHENED" and
one against "I" - the third letter of TRIPLEX so most likely made in
the third quarter of 1949 or just possibly replacement glass made in 59.
  As both pieces are identical my guess would be the former.  Unfortunately
the glass is quite badly scratched but may respond to the services of
a professional glass polishing operation, or may even have ago myself.

Parts ready to go to S&T Electroplating in Bristol.
 http://www.chromebysandt.com/
S&T did the chrome on my Healey 3000 and XK140,
both to a superb standard.  Windscreen surround eventually
removed from glass with great difficulty and the help of a heat
gun to soften /melt the rubber U shaped channel to glass seals.
    

So - this is the view of the workshop at the beginning of February
2012.  Can't wait to get the engine parts and chassis back and start
putting things back together.  With most of the really dirty work
completed, I've even taken my "stand up by itself" boiler suit home
 for a wash.
After my visit today (Feb 2nd) to see Alex at Auto Bodycraft, he feels its quite likely that he will no longer need the chassis by early March (a month ahead of schedule) which will give me around four weeks from now to  finish the major sub assemblies, but excluding the engine rebuild.

I was given fair warning that engine machining specialists, AMAC whilst having an excellent reputation for high quality work would take a little "chasing" to have my engine parts back for the end of January as agreed, and this is now the case.  Its just a matter of them prioritising my job over somebody else.   With so many other diverse jobs to do, it isn't an issue right now, but I know from experience that it will need some pressure, which if not applied now will be all the harder to apply, say 3 months from now when the season is in full swing.  It's always the case that the very best people are always too busy.

Wednesday, 18 January 2012

POST 22 - JANUARY 2012 - MANIFOLD N.O.S. PARTS AT HERITAGE

I have never forgotten, at age 16, seeing the engine bay of a nearly new MK2 Jag, topped off with polished aluminium cam covers, twin SU's and shiny black vitreous enamel exhaust manifolds.  I'd seen a few posh engines before, but those manifolds were different, unusual, an unexpected delight, and clearly left a lasting impression.

Fast forward 44 years - At significant cost, I had my 140 manifolds re-coated by a man in Hampshire.  They were away quite some time but looked fabulous when returned.  The package included detailed instructions on "curing" the new coating by gradually building up the heat with a cool down period between each cycle.  I followed this to the letter, a couple of days before the cars maiden voyage, a trip to the Silverstone Classic.
It was a very warm weekend with the engine still tight, running in, and hotter than I would have liked.  After switching off, due to heat soak, the water temperature gauge (a Smiths unit combined with the oil pressure gauge)would read 95 PSI or even less! (XK drivers will realise this is not a typo or an erroneous piece of misinformation).
The Saturday track action finished with a huge thunderstorm and flash floods.  On the way back to our Peterborough Hotel the 140 never missed a beat, often thrashing through several inches of standing water with clouds of steam pouring from the very hot engine bay.  Great fun. 
Back at Silverstone on Sunday I opened the bonnet to show off my newly built engine with shiny black enamel manifolds, to find most of the enamel had fallen off.  I guess as a result of some very rapid hot / cold cycles.
The man from Hampshire was entirely unimpressed with my protestations.  He'd obviously heard it all before.

It took a while to get over this, with the ratty appearance of the manifolds spoiling an otherwise immaculate engine bay.  Eventually I sent them of to Zircotec for coating with their patented ceramic process, not nearly as nice as black enamel but at least reliable and not effected by alternating temperature extremes.


Zircotec coated 140 manifolds.  I really need to take the rust of
the ends of the studs, but its -6 in the garage so it may have to
wait till spring.
So this brings me back to the 120.  The manifolds are in the usual parlous state with a couple of snapped studs.  Zircotec now have a new process with a smooth black finish but it is eye wateringly expensive.  SNG Barratt have had some re-manufactured at a around £360.00 a pair, and I still see the Hampshire man advertising refurbishment, again at similar cost, but he does include new studs.  
During one of my regular trawls through EBay I find a pair listed as 'New Old Stock' at a starting price of £350.00.  They don't go, so I contact the seller direct, Heritage Jaguar Parts.  We agree a price and I arrange to collect from their warehouse in Dewsbury, West Yorkshire. 

I travel down with friend Mike (two E types) Cassidy and we are both stunned at what we find.  Hidden away in a labyrinth of decaying Dickensian mill buildings, just off the Huddersfield Road, is a single large white washed store room with a huge quantity and range of new and used, but all original E type and XK parts, certainly running into tens of thousands of items.  We are well met by Jason who runs this relatively new operation and he explains that it is the direct result of the purchase of several container loads of parts from a single USA source (with more to come).  There are rare and really hard to find parts every where you look, with many boxes yet to unpack.  Imagine going to an auto jumble, but with only E Type, XK and some early saloon parts and mostly without all the usual junk. 

Just one corner of the store - mainly engines, gearboxes
and heads in this area.  Out of camera shot is a small mountain
of pistons and another of con-rods.  Over a dozen pairs of smooth
stud cam covers are on the orange shelf unit.

One of several random boxes of instruments awaiting
identification and labelling.
The only non Jag parts I see are the odd rare MG and Bentley item.  The down side is that many of the parts are still to be sorted and put on shelves, so considerable time needs to spent rummaging.  In a large carton full of original Lucas boxed head light rims and fittings, I find what I believe are two brand new old stock inner head light rims, almost the last of my really hard to find missing 120 parts. 


I am only guessing and hoping that these are the correct inner
rims for an early 120 never having seen an example off a car.
.
Lovely new old stock Vitreous Enamelled manifolds.
Don't know how long they'll stay like this but I will take
bets it will be longer than a brand new pair made in ?????
The manifolds are found and are exactly as described, in as new condition clearly never having seen the rest of an XK engine.  Who knows, with around 50 years for the enamel to cure it may stay on a little longer than usual.

Contact details for Jason at Heritage Jaguar Parts :
Telephone  01924 430818
jason@heritagejaguarparts.com   http://www.heritagejaguarparts.com/