Thursday, 17 May 2012

POST 30 - MAY 2012 - FUEL PUMP RECON

Another infill job is required whilst waiting for the return of the cylinder head and ash frame for the boot lid.  Having piped up the brake system, the next logical job has to be the the fuel line and pump.  The original pipes appear to be copper and whilst covered in all manner of crud, they are in excellent condition with undamaged unions.  The SU fuel pump however is in a pretty bad way.  It just looks awful and stinks of stale petrol / old paint and a 12 Volt supply across it met with an unsurprising silence.

Original SU High Capacity (Type LCS) pump - dirty and dead
I can easily replace it by plumbing in a modern Facet pump but there are other considerations:
  • The pipe work and unions would need some surgery with naff looking bits of rubber hose and clips.
  • There is something reassuring about the click - click - click of an SU fuel pump.
  • Depending upon the precise volume, tone and frequency of the "click" a whole range of fuel line faults can be diagnosed.
  • The critical path / weakness, the points can now be replaced with a solid state upgrade kit.  The downside to this is that you will no longer have the satisfaction of hearing the result of a good whack.
  • It is still possible to telephone Burlen, the main UK supplier of parts and have a proper technical conversation with a knowledgeable human being. 
  • I think concours judges should ask for the ignition to be turned on and then deduct a few points for silence or some other inappropriate noise.
Apart from the points under the black plastic cover, the innards and workings of SU fuel pumps have always been a bit mysterious, but with nothing to lose, it only takes around twenty minutes to have it totally dismantled.

Fully dismantled - note 11 brass spherical rollers.  Also note
the amount of very fine black muck on the inlet cover plate
compared to the relatively clean outlet side cover plate

Diaphragm / Bronze rod, brass spherical rollers and return spring
The detailed description of it's operation in the Factory Workshop Manual, coupled with all the bits laid out in front of me eventually unravel the mystery.   The only electrical part of the pump that will be retained is the magnetic coil embedded in the iron core body.  Loosely holding the diaphragm and bronze rod within the central hole in the magnetic core, and momentarily applying 12 volts produces an immediate upward movement and familiar click.

For future reference
A known working magnetic coil measures around 4 ohms
A full service kit and negative earth solid state PCB  are ordered from Burlen.  The end plates and body are painted and all other parts cleaned.   A large amount of compacted fine black muck was removed from the inlet chamber containing the brass gauze filter so this clearly dose a sterling job.

The service kit when it arrives is inspected and I find the bronze rod attached to the diaphragm is around half an inch shorter than the original.  It transpires that this version of pump has a long and short body.  More return postage costs!  Also, the kit contains a new rocker / point assembly which will not be required.

Ready for re-assembly.  Parts on the bottom row are not required

The diaphragm assembly is held central in it's housing by 11 (odd number ?) spherical rollers (thick brass washers) which appear to be unworn.  These are reluctantly replaced by the 5 x figure of eight nylon items supplied in the service kit (see the above picture).   There's probably a good reason for this, but I would be interested to know the thinking behind it.  Also one of the two thin brass discs in the non return valve assembly is replaced with a plastic disc.  It takes a phone call to Burlen to discover which one (its the top one - apparently ?) again - Why

Fitting the five nylon bits around the diaphragm was fiddly but otherwise, re-assembly was fairly straightforward. 
The conversion to solid state was also quite easy and interesting.  An aluminium machined bit (note - the term "bit" is used as a generic term for nondescript items) containing a small magnet is screwed onto the end of the bronze rod in place of the rocker / points assembly. 

Electronic conversion kit fitted.  Aluminium magnet "carrier"
in centre, screwed onto end of bronze rod.

The magnet influences a Hall effect transistor on the PCB which conducts, energising the coil which moves the brass rod and magnet upwards.  Once out of the "influence zone" of the Hall effect, conduction stops, and helped by a big spring, the rod returns to its original position and the whole sequence starts again.  On the pull stroke, fuel is sucked from the tank into a holding chamber and on the return stroke it is sent on it's way to the carburettors.   This is probably an over simplification of the workings, but I think in principle, it's about right.  One thing I have learned, is that the distinct clicking noise is not from the points as I had always imagined, but from the diaphragm centre hitting the body on the pull stroke.

Re-built pump - total cost of parts including electronic conversion
kit and set of new cheese head screws £110.05 plus carriage.
Around the same price of a Facet kit. 
Miscellany - related topics

May 7th, Bank Holiday Monday in the UK saw a few JDC Area 11 members congregate at Croft circuit for a Track Day.  Normally restricted to 88dB maximum (Normal car exhaust level) this was unusually a 105dB day which brought all manner of mad machinery out to play.  My XK140 registered 98dB which I find hard to believe, but was assured that the meter had been calibrated that very morning.
Line up of Jags at Croft.  There was also a full race spec D type
replica, but owner took it home and came back in the 120 OTS
Whilst dry for most of the day, it was bitterly cold.   I did feel somewhat guilty flogging the puddings out of my treasured old 140 fixed head, but any other course would have been pointless.   I also got to ride passenger in a few other exotics, but the highlight was a couple of very quick laps in a C type re-creation (replica would not do this fabulous New Zealand built, tool room copy, justice). I'm never a good passenger but Pilot Geoff Mansfield had me holding on tight with perfect lines and beautifully controlled drifts.  I suppose at his age, he's had an awfully long time to perfect his technique!

Wife Angie's just gone on holiday to Spain, which should mean I'll have a little more to show than a re-built fuel pump in the the next fortnight.

Next Post - Beginning of June


Wednesday, 2 May 2012

POST 29 - MAY 2012 - BOOT LID ABANDONED - BRAKES STARTED

I've spent the best part of a week trying to make a new frame for the recently acquired second hand boot lid skin.  It didn't go well.  In desperation I drove to Harrogate to borrow a proper band saw then ruined a few more pieces of plywood practising my technique, snapped the blade and eventually came to the conclusion that it would be bordering on criminal to waste the countries Ash reserves in a vain attempt to succeed.  The final point of submission came, when browsing eBay for XK120 related bits.  I came across an offer for 140 Ash door frames and whistled off an email asking if a 120 boot lid frame was possible - answer - absolutely no problem and £250.00.  So around 30 wasted hours - hind sight is a wonderful thing.

Now behind schedule, some real progress is required, calling for a few easy tasks.  Brakes are usually pretty straight forward and I think I have all the requisite parts to hand.  The master Cylinder presents no problems, re sleeved with a stainless liner at a cost of £60.00 and rubber seal kit, it's really just a pleasant assembly job.

Brake master cylinder presents quite a few opportunities to fit
bits in the wrong order or wrong way round.
To save a little time, I have acquired a brake pipe kit, and go about allocating each pipe to it's respective location but something is amiss.  In April 1952 the single output master cylinder was replaced by a more complex dual circuit type, and my brake pipe kit seems to be for this later set up.  Its quickly replaced with another kit, but this induces further head scratching before I notice the letters LHD on the label.  Again it's replaced, but the third kit has a genuinely random selection of pipes.  Returned, but this time with a note saying "I surrender, please credit".
The spares manual contains part numbers for each pipe and each version - Early / Late / RHD / LHD.  The part number actually includes the pipe length in inches so not difficult to get right.  My eventual solution is a 25ft length of Kunifer pipe and a selection of brass unions.  It actually cost more than the made up kit but at least I am back in control.  For some good information on brake pipe :
http://www.copper.org/applications/automotive/brake.html 

Master cylinder and brake pedal assembled.

Kunifer pipe, 90% copper and 10% nickle but not easy to work with.
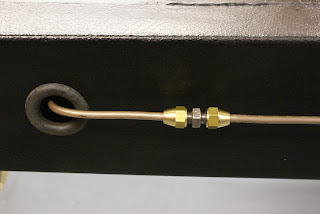
Joint at mid point to feed rear brakes.  Why?
Interestingly, the later dual circuit master cylinder apparently caused Jaguar quite a few headaches due to reliability issues and they reverted back to the original 120 type when they launched the XK140.

Miscellany - related topics
Sporting Bears organised a cracking good day out for poorly and handicapped children on Friday 6th April, at our local Motor Sport Park just one mile from my workshop in South Bank Middlesbrough.
The general format was to take passengers including mums, dads and carers around the race track in a selection of posh, performance and classic cars.  The turn out was remarkable, with numerous Lamborghinis, Porches and a couple of brand new Bentleys.  Understandably, the children loved the Lambo's, with not much interest in old Jags, but a couple of mums did comment on my XK140's wonderful walnut furniture.  Our caution on the track soon turned to some minor 'gung-ho' behaviour, mainly egged on by even more enthusiastic passengers.  All great fun and very safe of course.

Sporting Bears at Teesside Motor Sport Park.  Never seen so many
Lamborghinis in one place before.  The children loved them!
The UK Classic car season gets into gear around now with numerous events and gatherings scheduled over the coming months. Next is a Track day at Croft on May 7th.  Just hope it warms up a little.  I know it's an Englishman's prerogative to complain about the weather, but for all of April, here in North East England it has not once reached 13 degrees centigrade and it seems to have rained almost continually.  Wife Angie's penchant for holidays in southern Spain is starting to make sense.

Next Post mid May.